Koha is a Library Management System (LMS) used worldwide by approximately 15,000 libraries. The Koha team at Catalyst are passionate about using Koha and helping libraries (big and small!) get the most out of their Koha LMS.
This is the fourth blog in the Koha tips and tricks series to help you make the most out of your Koha instance. In this post, Alex covers some of the powerful, time-saving Koha configurations that automate library processes and tasks, allowing library staff to concentrate on the really important job of helping patrons find useful resources.
To read from the beginning of the tips and tricks series start here.
1. Can library patrons change their own password online without library staff having to change it for them?
Yes, this is an easy configuration to set up in Koha. It simply requires library staff, in the staff client, to go to Administration->Global system preferences->OPAC and enable the OPACResetPassword syspref.

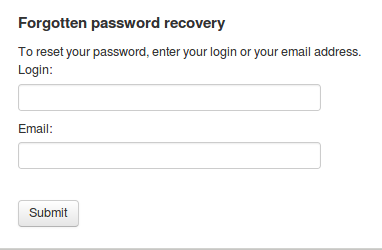
After this syspref is enabled a ‘Forgot your password’ link will be displayed under the login form on the OPAC.
To change their password after clicking this link the patron will need to input their username or email address for a password reset email to be sent to them.

2. Can items shelving locations be automatically updated as items are circulated by Koha?
Shelving location (952$c field in the MARC21 framework) is the temporary physical location within the holding (current) library that the item is in.
As items are added to the library catalogue and circulated, their shelving location will change.
For example, after a patron returns an item to a library the item will not immediately appear back on the library shelf, instead, it will most likely be placed on the shelving cart waiting for a member of the library staff to return it to its permanent location on the display shelf.
The shelving location value allows the Koha LMS to reflect the real-world workflow of how items move within a library branch, thereby helping library staff and patrons to quickly and easily locate an item.
The shelving location values are tied to the ‘LOC’ authorised values (editable in the staff client by going to Administration->Authorized values, then selecting ‘LOC’ from the ‘Show category’ drop-down selector). To be able to use the shelving location, you first need to make sure your ‘LOC’ authorised value has at least two values:
- ‘In processing’
- ‘Shelving cart’
As shown in the below screenshot:

Now there are three system preferences you can use to automatically change the item shelving location when specific actions happen to the item. (Accessible in the staff client by going to ‘Administration->Global system preferences’ and then searching for the name of the system preference.)
These system preferences are:
- NewItemsDefaultLocation – Set a default item shelving location for newly created items
- InProcessingToShelvingCart – If set to “Move” when items are checked in if their item shelving location equals ‘PROC’ (‘In processing’) change it to ‘CART’ (‘shelving cart’)
- ReturnToShelvingCart – If set to “Move” when all items are returned set their shelving location to ‘cart’ (‘shelving cart’)
Here is an example to illustrate how the ReturnToShelvingCart syspref works (from the point of view of what is displayed to library patrons in the OPAC):
- Set the ‘ReturnToShelvingCart’ syspref to “Move”
- View an item

- Check the item out to a patron, then return it
- Notice the shelving location is changed to ‘Shelving Cart’, as highlighted in the below screen-shot:

So now patrons know to look in the shelving cart for the item rather than on the display shelf.
Koha also has a script that you can set up to run once an hour, to automatically change an item’s shelving location from ‘shelving location’ to no value, if the item has been on the shelving cart for more than a given number of hours.
This script (cart_to_shelf.pl) can be set up to be run by a member of library staff with server access or a support vendor.
The benefit of this script is that library staff do not have to manually edit the shelving location of each returned item, Koha does it for them!
3. Borrower Restrictions
3a. What are borrower restrictions?
When a patron has a restriction on their account it means items cannot be checked out to them (unless overridden by a library staff member). This is generally the result of the borrower having overdue items.
3b. Can borrower restrictions be automatically placed on patrons accounts if they have overdue items?
Yes, Koha provides the functionality to automatically place restrictions on borrowers with overdue items. Use the following process to set this up:
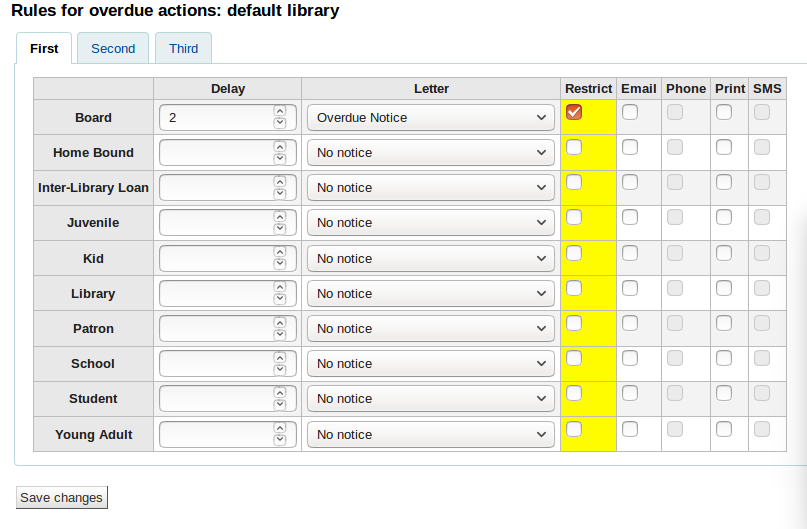
- In the staff client go to: Tools->Overdue notice/status triggers.
- Overdue notice/status triggers interface allows you to customize what happens to patrons from each patron category when they have overdue items.
In the below example all patrons with the patron category of ‘Board’ will be automatically restricted (as the ‘Restrict’ checkbox is selected) – at the same time as an overdue notice is sent to them – after a delay of 2 days (as ‘Delay’ input has a value of 2) from their item becoming overdue. The rule we are interested in is ‘Restrict’, highlighted in the below screenshot.

3c. Can they be automatically removed when the overdue items are returned using Koha?
Yes, Koha provides the functionality to automatically remove place restrictions on borrowers when their overdue items are returned. Use the following process to set this up:
- In the staff client go to: Administration->Global system preferences: Search for ‘AutoRemoveOverduesRestrictions’.
- Set the ‘AutoRemoveOverduesRestrictions’ syspref to ‘Do’. This will automatically remove the restriction on the borrower when they return their overdue item.
Click here for the next post in Alex’s series: Koha tips and tricks 5

If you have any questions or comments about this blog post or would like some support with your Koha instance you are welcome to email us at koha@catalyst.net.nz
Follow Catalyst Koha on Twitter!
